REVIEW · AUCKLAND
Gallery Highlights Tour and General Admission
Book on Viator →Operated by Auckland War Memorial Museum · Bookable on Viator
NZ history clicks in one museum loop. This Gallery Highlights Tour is a solid intro to Māori culture and Polynesian navigators, and I like how a guide can turn big themes into real stories (you may even get someone like Maureen, a volunteer with 15 years behind her). One key drawback: Te Marae Ātea Māori Court & Pacific Galleries are temporarily closed, so some Māori and Pacific sections you’d expect won’t be part of your route.
Plan for a short but meaningful walking visit. The tour is capped at 10 travelers, so questions stay easy, and you’ll start at Auckland War Memorial Museum in Parnell and finish right back there. Also note the route includes stairs, so if you have extra mobility needs, this one may be tough.
If you want more than the hour with a guide, you get that too. General admission is included, so you can stretch the day (think 1 to 4 hours total) and tack on time for the two museum cafés, plus any optional special exhibitions or experiences that require separate tickets.
In This Review
- Key points to know before you go
- Auckland War Memorial Museum: the smart starting point in Parnell
- Gallery Highlights Tour flow: a 1-hour guide plus flexible museum time
- Stop 1: Māori culture, Polynesian navigators, and Aotearoa’s natural story
- Stop 2: Moa and ANZAC rooms, plus the WW1/WW2 impact
- The temporary closure: what Te Marae Ātea and Pacific Galleries mean for your plan
- Cafés and optional add-ons: how to spend smart without overshooting your budget
- Price and value: does $29.17 feel fair?
- Who this suits best (and who might prefer another option)
- Should you book the Gallery Highlights Tour?
- FAQ
- What does the price include?
- How long should I plan for this experience?
- Are special exhibitions or shows included?
- Where do I meet the guide?
- Is this tour suitable for visitors with mobility issues?
- What happens if the experience is canceled due to weather?
Key points to know before you go
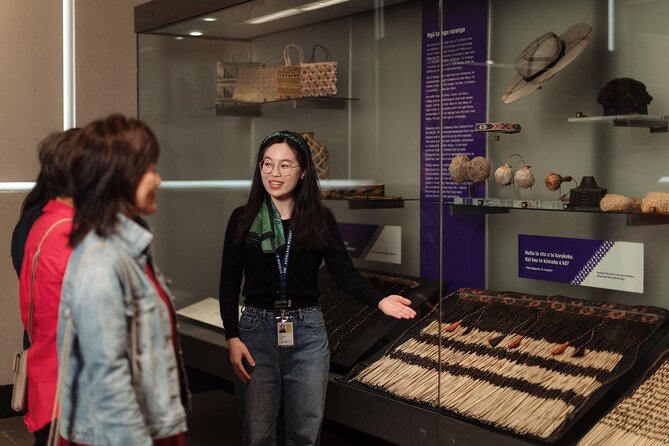
- A guided 1-hour highlights route across select galleries on all three floors
- Māori culture and Polynesian navigation explained as part of the wider New Zealand story
- Natural history and geology of Auckland and Aotearoa tied to people and place
- A small group of up to 10 makes it easier to ask questions as you walk
- Top-floor history stops like Moa displays, ANZAC rooms, and WW1/WW2 exhibits
- Te Marae Ātea Māori Court & Pacific Galleries are closed during maintenance
Auckland War Memorial Museum: the smart starting point in Parnell
Auckland War Memorial Museum sits in Parnell, and it’s a good “first stop” if you want New Zealand context fast. The museum covers a lot of ground: cultural history, natural history, and the events that shaped the country. The trick is choosing a route that won’t leave you wandering with a vague feeling of you-saw-some-things.
That’s where this tour helps. It’s designed as an orientation. You get a guided walk through selected galleries, so you’re not just looking at objects—you’re getting a framework for what you’re seeing and why it matters. The museum’s collections range from Māori and Polynesian themes to geology and conflict history, and the tour points you toward the connections.
Two things I really like about this style of visit:
First, it focuses on the big picture early (Māori culture and Polynesian navigation) instead of saving it for later. Second, it gives you just enough momentum to explore deeper afterward, especially in the history rooms that can hit hard when you’re in the right frame of mind.
And yes, there’s one major limitation to know upfront: Te Marae Ātea Māori Court & Pacific Galleries are temporarily closed for essential maintenance. If Pacific galleries or that specific Māori court are your top priority, adjust expectations before you arrive.
Gallery Highlights Tour flow: a 1-hour guide plus flexible museum time

The Gallery Highlights Tour itself runs about 1 hour. It’s focused and structured: select galleries across the museum’s three floors, guided end-to-end so you don’t waste time figuring out where to go next.
Then you use the included general admission to keep going. Your overall time in the museum is up to you, and the schedule is designed to work even if you don’t want to rush. In practice, many people plan for roughly 2 hours total after the guide, but the overall experience length is listed as 1 to 4 hours depending on how much you explore.
What makes this setup feel like good value is simple: you’re not paying only for a quick walk. You’re buying the chance to get your bearings during the guided hour and then convert that into your own museum time with the full ticket included.
A quick practical detail: the tour is a maximum of 10 travelers. That small size is a big deal in a museum. It means you’ll usually have room to ask questions, and the guide can tailor pacing if the group is interested in one topic more than another.
One more practical note: the tour includes walking up a flight of stairs. The museum is not marketed as “no stairs required,” so if stairs are a problem, you’ll want to plan an alternative visit.
Stop 1: Māori culture, Polynesian navigators, and Aotearoa’s natural story

The first guided stop is built to give you context. You’ll spend around an hour moving through key galleries that connect Māori culture with the achievements of Polynesian navigators. That pairing is smart because it helps you understand that New Zealand history is not just dates and battles—it’s also movement, knowledge, wayfinding, and how people arrived and made place.
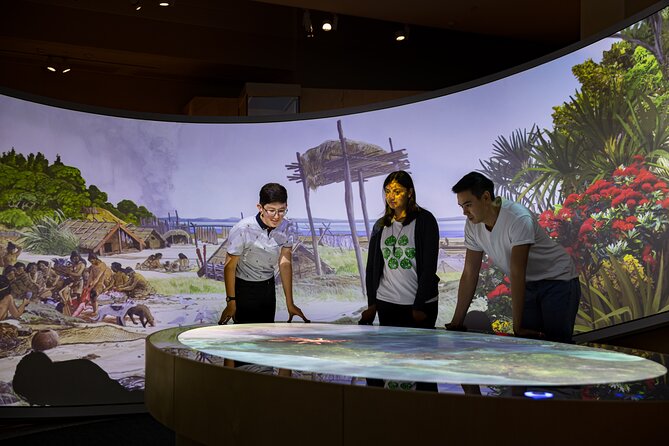
During this hour, the tour also points you to natural history and geology themes, specifically around Auckland and Aotearoa New Zealand. The idea here isn’t to turn the museum into a science lecture. It’s to show how environment shapes life and culture. When you see geology and natural history alongside human stories, the museum stops feeling like separate departments and starts feeling like one connected place.
Here’s what to do while you’re on this stop:
Pay attention to the explanations, but don’t treat them like homework. Use the guide as a way to create a short mental map:
- What are the core cultural themes?
- How does the museum explain navigation and arrival?
- Where does nature (geology, region) fit into that story?
If you’re the kind of visitor who usually gets overwhelmed in large museums, this approach helps a lot. You won’t need to read everything. You can scan and look for the “why” points the guide flags as you go.
Stop 2: Moa and ANZAC rooms, plus the WW1/WW2 impact

After the guided hour, you switch into “walk and choose” mode. The included general admission lets you explore beyond the tour route, and this is where the museum can become more emotional.
A few highlights to watch for as you move through the galleries:
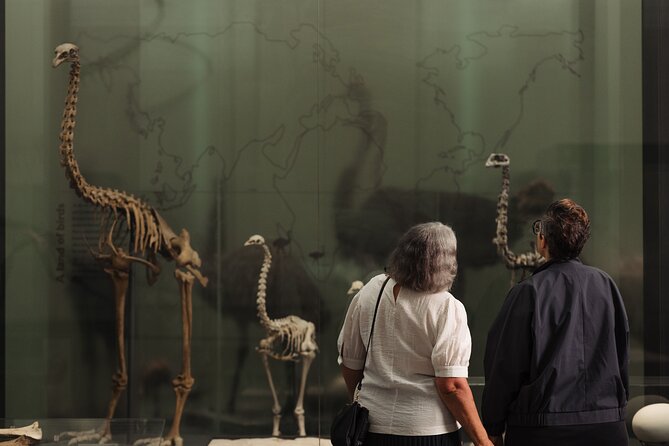
- Moa displays in the museum’s collection
- ANZAC rooms
- World War I and World War II exhibits, including sections that many visitors find especially poignant
Why is this worth planning for right after the guide? Because that first hour sets up context. When you later hit conflict and remembrance exhibits, it lands more strongly. Without context, war history can feel like names on walls. With context, it becomes part of the national story the museum is already telling.
You’ll also find the museum is generally easy to navigate, which matters if you’re trying to fit in time for cafés or extra exhibits without feeling lost. The building is big, but it doesn’t feel like a maze when you start from the main museum flow.
My practical tip: if your time is limited, focus on one “science plus culture” route (using what the guide seeded) and then pick one emotional history zone to sit with a bit longer. In a museum this size, that’s the difference between seeing a lot and remembering a lot.
The temporary closure: what Te Marae Ātea and Pacific Galleries mean for your plan
This is the biggest “check before you book” item.
Te Marae Ātea Māori Court & Pacific Galleries are temporarily closed until further notice due to essential maintenance. That means a chunk of Māori and Pacific presentation you might associate with Auckland War Memorial Museum won’t be available during your visit.
How to handle it:
- If Māori courts or Pacific galleries are your main goal, consider whether the rest of the museum still fits your priorities.
- If you’re happy with a guided overview of Māori culture and Polynesian navigation and then a broader museum day, you’ll still get a lot out of the highlights tour.
- Use the guided hour to identify other Māori and history sections you may not otherwise notice. The tour is meant to get you oriented, so even with closures, you can still find strong material.
This closure is also one reason some visitors feel the museum can seem small for the price. If the closed sections are exactly what you wanted to see, the remaining galleries may feel like less than expected. If your goals are more about getting a balanced overview of New Zealand’s past and present, the tour still does its job.
Cafés and optional add-ons: how to spend smart without overshooting your budget
One advantage of this experience is that it’s not all-or-nothing. You get general admission included, and you can decide how much extra to add.
Inside the museum, there are two cafes. When you’ve got a museum that’s both cultural and conflict-focused, sitting for a meal or a warm drink is not just pleasant—it helps you process what you’ve seen. This is especially true if you’re moving between natural history, culture, and war rooms.
You can also choose optional experiences that require separate tickets:
- an acclaimed Māori Cultural Experience
- major exhibitions (ticketed separately)
Here’s my advice on add-ons:
Pick one optional experience, not three. The museum already offers a full overview through the tour plus your self-paced time. If you add too much paid content, it can turn into a “run through the building” day.
If you’re visiting for first-time New Zealand context, I’d often prioritize the guided history context and then use the cafés plus one additional ticketed experience only if it directly matches your interests.
Price and value: does $29.17 feel fair?
The price is listed at $29.17 per person, and your day’s value comes from two items included:
- general admission
- the Gallery Highlights Tour ticket
So you’re not just paying for a guide’s time. You’re also paying for museum entry, which means you can use the guided hour to choose where to go next. If you only did the tour and didn’t explore afterward, the value drops. If you use the included ticket well, it gets more convincing.
Some people have complained about museum pricing compared with what locals get. If you come from a place where major cultural sites are cheaper for visitors, you might feel sticker shock. Still, a museum day is time. You’re getting both the guided orientation (which reduces guesswork) and additional hours to explore at your pace.
My rule of thumb:
- If this is your first major museum visit in Auckland and you want a guided start, this tour is a strong fit.
- If you already know exactly which galleries you want and you’re comfortable planning a self-guided route, you might choose to skip the guided hour to save money.
- If Te Marae Ātea and the Pacific Galleries are core to your interests, be ready for the closure reality.
Who this suits best (and who might prefer another option)

This tour is a great match if you want:
- a clear introduction to Māori culture and Polynesian navigation
- a guided way to understand how natural history and geology connect to place
- a manageable museum plan that doesn’t require endless map-reading
- time to see major history rooms like ANZAC and WW1/WW2 exhibits
It’s also ideal for mixed groups—someone who loves science and someone who loves history can both find relevant material on the tour route plus afterward.
Where it may not fit:
- If stairs are a problem for you, this experience requires walking up a flight of stairs.
- If you specifically came for Te Marae Ātea Māori Court and the Pacific Galleries, the temporary closure could make the tour feel incomplete.
- If you’re only interested in one narrow topic and you already know the exact galleries you want, you might get more out of a self-guided museum visit.
Should you book the Gallery Highlights Tour?
I’d book this if you’re in Auckland with limited time and you want the museum to make sense quickly. The guided hour is a real help for first-timers because it frames what you’ll see afterward in the history rooms, including the ANZAC and WW1/WW2 areas.
I’d hesitate if your trip goal is tightly focused on the closed Te Marae Ātea Māori Court & Pacific Galleries. In that case, check whether the other Māori and cultural content available during your dates still matches what you want.
If you do book, plan your day like this: use the hour to get your bearings, then give yourself time to linger in just one or two bigger-impact zones. Museums reward the slow spots, and this tour is built to help you find them.
FAQ
What does the price include?
The price includes a general admission ticket plus the Gallery Highlights Tour ticket.
How long should I plan for this experience?
The tour duration is about 1 to 4 hours total, depending on how much time you spend exploring before and/or after the guided part.
Are special exhibitions or shows included?
No. Other products like special exhibitions or shows are not included and typically require separate tickets.
Where do I meet the guide?
You start at Auckland War Memorial Museum in Parnell, Auckland 1010, New Zealand, and the activity ends back at the same meeting point.
Is this tour suitable for visitors with mobility issues?
The tour requires visitors to walk up a flight of stairs, so it is not suitable for visitors with additional mobility considerations.
What happens if the experience is canceled due to weather?
If it’s canceled due to poor weather, you’ll be offered a different date or a full refund.